使用Redis的Lua脚本实现接口限流
本文最后更新于:2023年7月3日 下午
准备工作
创建一个SpringBoot工程,引入下列依赖:
<!-- Aop 实现切面编程 -->
<dependency>
    <groupId>org.springframework.boot</groupId>
    <artifactId>spring-boot-starter-aop</artifactId>
</dependency>
<!-- Web -->
<dependency>
    <groupId>org.springframework.boot</groupId>
    <artifactId>spring-boot-starter-web</artifactId>
</dependency>
<!-- Redis -->
<dependency>
    <groupId>org.springframework.boot</groupId>
    <artifactId>spring-boot-starter-data-redis</artifactId>
</dependency>在项目的配置文件中写上redis连接信息:
spring:
  redis:
    port: 6379
    host: localhost
password:统一结果返回:
@Data
public class Result implements Serializable {

    private int code;
    private String msg;
    private Object data;

    public static Result success(Object data) {
        return success(200, "操作成功", data);
    }

    public static Result fail(String msg) {
        return fail(400, msg, null);
    }

    public static Result success (int code, String msg, Object data) {
        Result result = new Result();
        result.setCode(code);
        result.setMsg(msg);
        result.setData(data);
        return result;
    }

    public static Result fail (int code, String msg, Object data) {
        Result result = new Result();
        result.setCode(code);
        result.setMsg(msg);
        result.setData(data);
        return result;
    }
}全局异常处理:
@RestControllerAdvice
public class GlobalExceptionHander {
    @ExceptionHandler(RuntimeException.class)
    public Result fail(RuntimeException e){
        return Result.fail(e.getMessage());
    }

    @ExceptionHandler(Exception.class)
    public Result fail(Exception e){
        return Result.fail("系统异常!");
    }
}
限流注解
接下来我们创建一个限流注解,我们将限流分为两种情况:
- 针对当前接口的全局性限流,例如该接口可以在 1 分钟内访问 100 次。
- 针对某一个 IP 地址的限流,例如某个 IP 地址可以在 1 分钟内访问 100 次。
针对这两种情况,我们创建一个枚举类 LimitType :
public enum LimitType {
    /**
     * 默认策略全局限流
     */
    DEFAULT,

    /**
     * 根据请求者IP进行限流
     */
    IP
}
创建限流注解 RateLimiter :
@Target(ElementType.METHOD)				//作用目标在方法上
@Retention(RetentionPolicy.RUNTIME)
@Documented
public @interface RateLimiter {
    /**
     * 限流key前缀
     */
    String key() default "rate_limit-";

    /**
     * 限流时间,单位秒
     */
    int time() default 60;

    /**
     * 限流次数
     */
    int count() default 100;

    /**
     * 限流类型,默认DEFAULT
     */
    LimitType limitType() default LimitType.DEFAULT;
}
如果需要限流,就在对应的那个接口上添加 @RateLimiter 注解,然后配置相关参数即可。
定制 RedisTemplate
在 Spring Boot 中,我们其实更习惯使用 Spring Data Redis 来操作 Redis,不过默认的 RedisTemplate 有一个小坑,就是序列化用的是 JdkSerializationRedisSerializer,不知道小伙伴们有没有注意过,直接用这个序列化工具将来存到 Redis 上的 key 和 value 都会莫名其妙多一些前缀,这就导致你用命令读取的时候可能会出错。
例如存储的时候,key 是 name,value 是 javaboy,但是当你在命令行操作的时候,get name 却获取不到你想要的数据,原因就是存到 redis 之后 name 前面多了一些字符,此时只能继续使用 RedisTemplate 将之读取出来。
我们用 Redis 做限流会用到 Lua 脚本,使用 Lua 脚本的时候,就会出现上面说的这种情况,所以我们需要修改 RedisTemplate 的序列化方案。
@Configuration
public class RedisConfig {
    @Bean
    public RedisTemplate<String, Object> redisTemplate(LettuceConnectionFactory factory) {
        RedisTemplate<String, Object> redisTemplate = new RedisTemplate<>();
        RedisSerializer stringSerializer = new StringRedisSerializer();
        redisTemplate.setConnectionFactory(factory);

        // 解决key的序列化方式
        redisTemplate.setKeySerializer(stringSerializer);
        redisTemplate.setHashKeySerializer(stringSerializer);

        // 解决value的序列化方式
        Jackson2JsonRedisSerializer<Object> jackson2JsonRedisSerializer = new Jackson2JsonRedisSerializer<>(Object.class);

        //序列化时将类的数据类型存入json,以便反序列化的时候转换成正确的类型
        ObjectMapper objectMapper = new ObjectMapper();
        objectMapper.activateDefaultTyping(LaissezFaireSubTypeValidator.instance, ObjectMapper.DefaultTyping.NON_FINAL);

        // 解决jackson2无法反序列化LocalDateTime的问题
        objectMapper.disable(SerializationFeature.WRITE_DATES_AS_TIMESTAMPS);
        objectMapper.registerModule(new JavaTimeModule());
        jackson2JsonRedisSerializer.setObjectMapper(objectMapper);

        redisTemplate.setValueSerializer(jackson2JsonRedisSerializer);
        redisTemplate.setHashValueSerializer(jackson2JsonRedisSerializer);

        return redisTemplate;
    }
}
开发 Lua 脚本
Redis 中的一些原子操作我们可以借助 Lua 脚本来实现,想要调用 Lua 脚本,我们有两种不同的思路:
- 在 Redis 服务端定义好 Lua 脚本,然后计算出来一个散列值,在 Java 代码中,通过这个散列值锁定要执行哪个 Lua 脚本。
- 直接在 Java 代码中将 Lua 脚本定义好,然后发送到 Redis 服务端去执行。
Spring Data Redis 中也提供了操作 Lua 脚本的接口,还是比较方便的,所以我们这里就采用第二种方案。
resources 目录下新建 lua 文件夹专门用来存放 lua 脚本,脚本内容如下:
local key = KEYS[1]
local count = tonumber(ARGV[1])
local time = tonumber(ARGV[2])
local current = redis.call('get', key)
if current and tonumber(current) > count then
    return tonumber(current)
end
current = redis.call('incr', key)
if tonumber(current) == 1 then
    redis.call('expire', key, time)
end
return tonumber(current)
KEYS 和 ARGV 都是一会调用时候传进来的参数,tonumber 就是把字符串转为数字,redis.call 就是执行具体的 redis 指令,具体流程是这样:
- 首先获取到传进来的 key 以及 限流的 count 和时间 time。
- 通过 get 获取到这个 key 对应的值,这个值就是当前时间窗内这个接口可以访问多少次。
- 如果是第一次访问,此时拿到的结果为 nil,否则拿到的结果应该是一个数字,所以接下来就判断,如果拿到的结果是一个数字,并且这个数字还大于 count,那就说明已经超过流量限制了,那么直接返回查询的结果即可。
- 如果拿到的结果为 nil,说明是第一次访问,此时就给当前 key 自增 1,然后设置一个过期时间。
- 最后把自增 1 后的值返回就可以了。
接下来我们在一个 Bean 中来加载这段 Lua 脚本,可以放在上面的 RedisConfig 中,如下:
@Bean
public DefaultRedisScript<Long> defaultRedisScript(){
    DefaultRedisScript redisScript = new DefaultRedisScript();
    redisScript.setScriptSource(new ResourceScriptSource(new ClassPathResource("/lua/limit.lua")));
    redisScript.setResultType(Long.class);
    return redisScript;
}
限流注解的切面定义
自定义切面,来解析这个注解了,我们来看看切面 RateLimiterAspect 的定义:
@Aspect
@Component
@Slf4j
public class RateLimiterAspect {
    @Autowired
    private RedisTemplate<String, Object> redisTemplate;		// 用于执行lua脚本
    @Autowired
    @Qualifier("defaultRedisScript")							// 使用刚才我们定义的那个Bean的别名
    private RedisScript<Long> redisScript;

    @Before("@annotation(rateLimiter)")							// 使用前置通知
    public void doBefore(JoinPoint joinPoint, RateLimiter rateLimiter) {
        String key = rateLimiter.key();
        int count = rateLimiter.count();
        int time = rateLimiter.time();

        String combineKey = getCombineKey(joinPoint, rateLimiter);	// 获取唯一标识的key
        List<String> keys = Collections.singletonList(combineKey);
        try {
            Long number = redisTemplate.execute(redisScript, keys, count, time);
            if (number == null || number.intValue() > count) {
                throw new RuntimeException("访问过于频繁,请稍候再试");
            }
        }catch (RuntimeException e){
            log.info("访问过于频繁,请稍候再试");
            throw e;
        }
        catch (Exception e) {
            log.info("服务器限流异常,请稍候再试");
            throw e;
        }

    }

    private String getCombineKey(JoinPoint joinPoint, RateLimiter rateLimiter) {
        StringBuffer buffer = new StringBuffer(rateLimiter.key());
        if (LimitType.IP == rateLimiter.limitType()) {	// 如果是IP限流,加上IP地址
            buffer.append(HttpUtil.getIpAddr(((ServletRequestAttributes) RequestContextHolder.currentRequestAttributes()).getRequest())).append("-");
        }
        MethodSignature signature = (MethodSignature) joinPoint.getSignature();
        Method method = signature.getMethod();
        Class<?> aClass = method.getDeclaringClass();
        buffer.append(aClass.getName()).append("-").append(method.getName());
        return buffer.toString();
    }
}
这个切面就是拦截所有加了 @RateLimiter 注解的方法,在前置通知中对注解进行处理。
- 首先获取到注解中的 key、time 以及 count 三个参数。
- 获取一个组合的 key,所谓的组合的 key,就是在注解的 key 属性基础上,再加上方法的完整路径,如果是 IP 模式的话,就再加上 IP 地址。以 IP 模式为例,最终生成的 key 类似这样:
rate_limit-127.0.0.1-com.exam.securitydemo.controller.IndexController-index(如果不是 IP 模式,那么生成的 key 中就不包含 IP 地址)。- 将生成的 key 放到集合中。
- 通过 redisTemplate.execute 方法取执行一个 Lua 脚本,第一个参数是脚本所封装的对象,第二个参数是 key,对应了脚本中的 KEYS,后面是可变长度的参数,对应了脚本中的 ARGV。
- 将 Lua 脚本执行的结果与 count 进行比较,如果大于 count,就说明过载了,抛异常就行了。
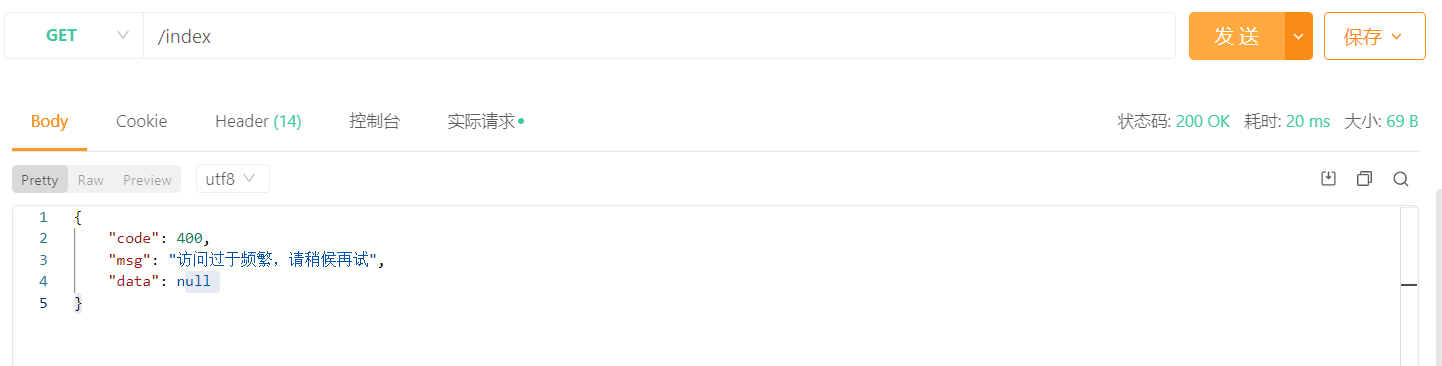
测试
接下来我们就进行接口的一个简单测试,如下:
@PreAuthorize("hasAuthority('admin')")
@RateLimiter(time = 5,count = 3,limitType = LimitType.IP)
@GetMapping("index")
public Result index(){
    return Result.success("成功访问!");
}
同一个 IP 地址,在 5 秒内只能访问 3 次,超过3次抛出异常 RuntimeException("访问过于频繁,请稍候再试")